In early 2020, I posted an article about the crash and subsequent death of William G. Rueckert of the 93rd BG, 409 BS at RAF Hardwick in Norfolk. Since posting this article, I was contacted by his son, ‘Little Bill’, who has very kindly sent me a collection of photographs, letters, documents and a considerable amount of information around both his father’s life and his tragic accident. I wholeheartedly thank Bill for this – in some cases – very personal information, which has helped to build a bigger and more detailed image of the life of William Rueckert. This has been added to the page and is included here with Bill’s permission. I am republishing this in honour of the man who gave his all for freedom.
The journey of how ‘Little Bill’ found out the details of his father’s death was a long and somewhat difficult one, as many of the official records were destroyed in the St. Louis fire. It was made more difficult by the fact that at home, 1st. Lt. William Rueckert was never talked about by Bill’s mother and step father (2nd Lt. Leroy H. Sargent), and as Bill was only two and a half years old at the time of his father’s death, he knew little of him. It’s only since Bill’s mother sadly passed away in 1994 that Bill has been able to make proper enquires, kick started by the discovery of a copy of the “Ladies Home Journal” in the attic of her house. All Bill knew before this, was that his father was a pilot and that he died in a crash in England.

Ladies Home Journal (Jan. 1945) The magazine that started Bill’s journey to find out about his father.
Since then, Bill has written an article for the “STAR”, a journal for “AWON” (American War Orphans Network) and he has been given an article published in the ‘Weekender’, a supplement published by the Eastern Daily Press*1 newspaper in Norwich, UK, written in December 2014; the title of which was “No Greater Love”, an article about Bill’s mother and father.
His journey also allowed him to make friends with David Neale, an officer of the “Friends of the 2nd “, an organisation he joined not long after. Since then, he has travelled to England on many occasions, including attending the 2nd Air Division American Library Dedication in Norwich, in November 2001; visiting Madingley Cemetery and the former Hardwick airfield (owned and run by David Woodrow) where Bill’s father lost his life. He has also donated a replica of William’s Purple Heart to the local church at Topcroft, who honour both him and all those who served at Hardwick, every year.
This is 1st. Lt. William Rueckert’s story.
William Gamble Rueckert (S/N: 0-420521) was born June 9th 1920, in the Lutheran Hospital, Moline, Illinois. His father, Reuben Franklin Rueckert (26) was a chief electrician whilst his mother, Fay Wilforim Gamble (24) was a Housewife.
At school, William was a model student, developing a studious and conscientious approach to his studies. He worked hard at all he did, continuously achieving high grades; a work ethic he would carry and continue throughout his short life.
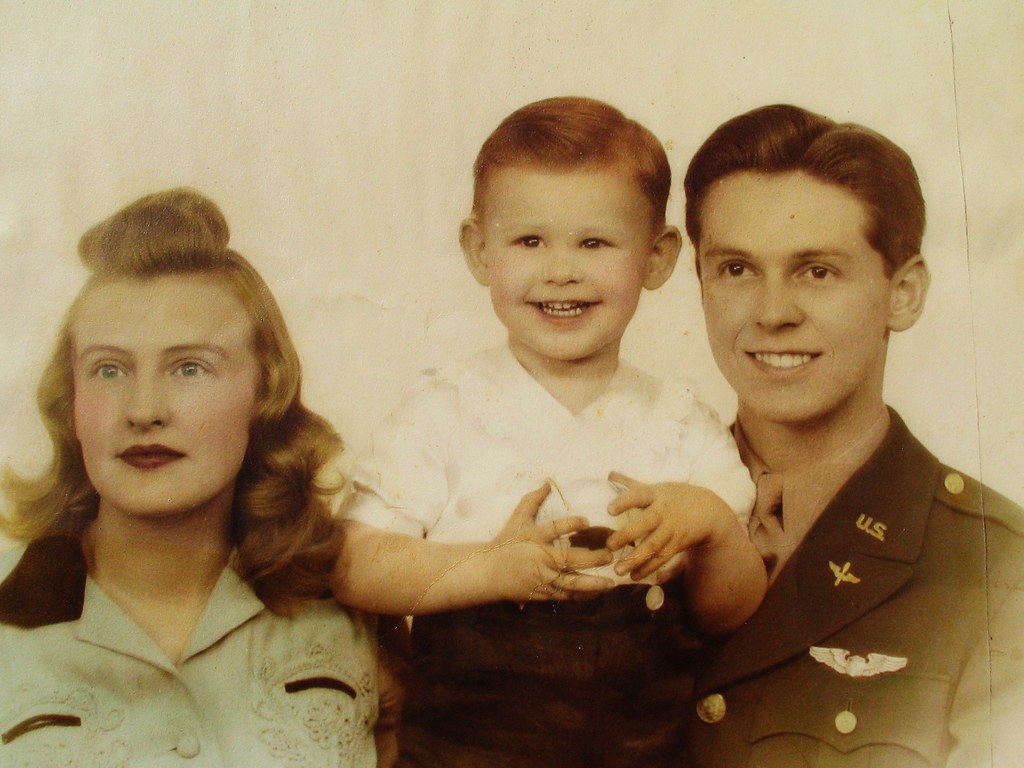
Dorothea ‘Dee’, Little Bill and William
At 18 years of age William joined the Cavalry Reserve Officers’ Training Corps (ROTC) at the University of Illinois, becoming a member of the ‘Scabbard & Blade‘, an Honorary Military Society that promotes and develops the “Five Gold Stars”: Honour, Leadership, Professionalism, Officership, and Unity. Here William studied law and used his passion for reading, particularly the classics like Shakespeare and Proust, to continue to achieve those high grades he was known for. His reputation for hard work and dedication was his bedfellow.
Whilst in the Cavalry, William got the nickname ‘Square John‘, he took to fencing and riding, whilst enjoying ‘Breaded Veal chop’ and listening to Ernie Pyle, an American journalist who would become one of the most famous war correspondents of World War II. One of the rules as a Cavalry Cadet was that you had to carry a ‘handkerchief’, this was used to fulfil the joyful operation of cleaning your horse’s rear, a very unpleasant but ‘necessary’ duty.
On graduating, William would be presented with a sabre from his class, fulfilling both roles of president of the Cavalry Officers’ Club and as a Cadet Major. The sabre would remain in the family home for many years after.

William ‘Square John‘ Horse jumping,
It was at University, on April 29th 1939, that William met on a blind date, his wife to be, Dorothea Griffiths, the woman he later referred to as ‘Dee’. Even before meeting up, the two were destined to face problems, a faulty car doing its utmost to prevent William from getting to his destination on time. But as a lover of dancing, William charmed Dee with his dance floor moves, and they turned out to be the perfect match, Dee forgiving William’s lateness and agreeing to see him a second time.
The two became inseparable, and within a year they were married, on June 10th, 1940, when William was just one day over 20 years old. The ceremony took place at Clinton, Iowa, but it would be here that the second of their problems would arise. Angry at the marriage, William’s mother objected, stating that he was too young to be legally married. Successfully, and much to the anger of William and Dee, she had the marriage annulled. However, the two were not to going to accept that, they simply ran away to repeat the wedding and reinstate their marriage vows in a new ceremony – love had conquered all.
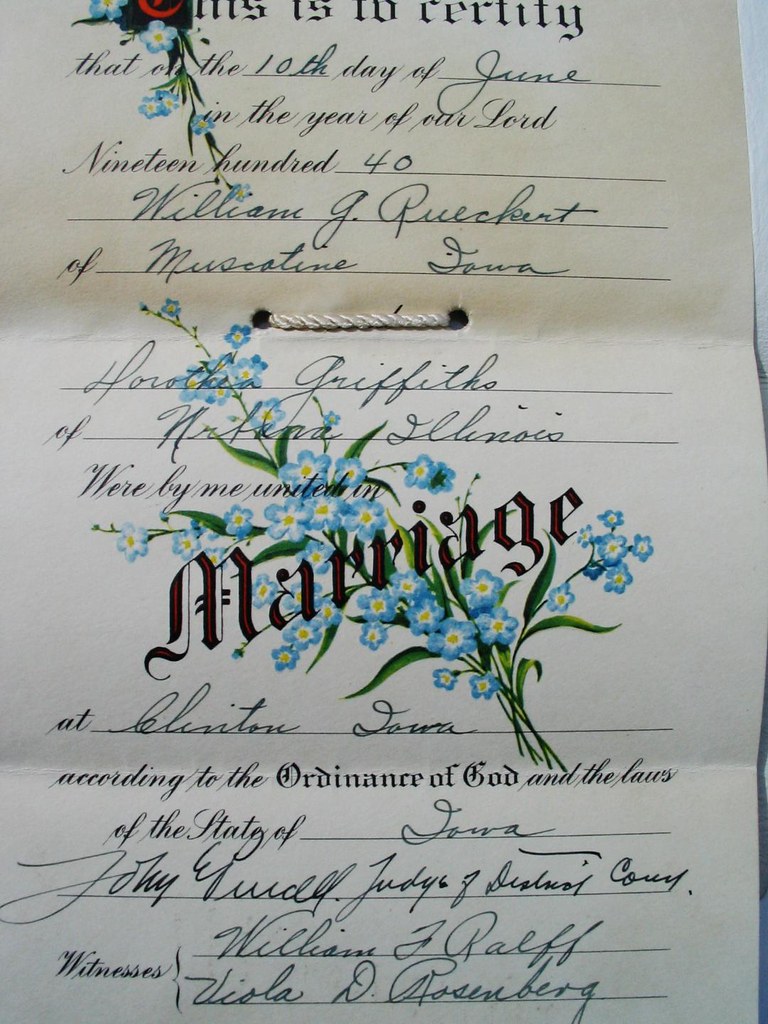
William and Dee’s second Marriage Certificate
After leaving the Cavalry and returning to his studies, he graduated from the University of Illinois with a Bachelor of Science in Commerce and Law on June 9th, 1941. William and Dee then moved to 64 Sommers Lane, Staten Island, on the southern edge of New York, Dee’s home town. William managed to secure himself a job with the Bethlehem Steel Co. a company that would become a major supplier of armour plate and ordnance to the U.S. armed forces. Here William worked in the accounts department, whilst all the time continuing to work for his law license with the New York State Bar.

William’s University Certificate
With the war in Europe escalating, William, being a reserve at this time, was called up under President Roosevelt’s Defence plan, in August 1941, and he was sent to the Maintenance Officer Company, 35th Armoured Regiment, Fourth Armoured Division Pine Camp, Watertown, New York. He served as a 1st Lt. Artillery Officer in Company ‘A’, 1st Battalion. It was here that the dedication and hard work that he had shown throughout his education would shine through yet again, quickly standing out from other cadets. William also stood out on the ranges, soon winning himself a medal for artillery and rifle shooting.
A heavily pregnant Dee joined William at Watertown not long after his call up, remaining at home as a ‘Housekeeper’ whilst William went about his duty. The love between them never faltering once. In an interview after his death, Dee described William as “Sweet” saying that “Even after we were married, he would telephone for a date and arrive home with flowers and candy.”
It was this love for each other that produced at 5:45pm on December 1st, 1941, the same month as the Japanese attacked Pearl Harbour, their first child, William Griffiths Rueckert (Little Bill). Bill being born in a small Catholic Hospital just outside the base at Watertown. In those first few years of his life, Bill would grow very fond of his father, a father who would sadly be taken away from him far too soon. William and Bill developing a mutual love for each other.
Four years after his military career had begun with the cavalry, and one year after leaving the Armoured Division at Pine Camp, William would make a big change in his career, resigning his commission and volunteering for the United States Air Corps. In Bill’s words referring to why his father left the Army he said: “After four years of wiping his horse’s ass, and looking up at the new way to travel, he had the flying bug“.
William Rueckert’s life then changed forever. In 1942 as a 1st Lt. Trainee Pilot, he left New York, Dee and his son, and moved to the West Coast Training Centre whose headquarters and administration centre was at Santa Ana Airbase in California.
Early Flight Training.
William would have progressed through several stages of training, from primary to basic, then on to advanced flying and eventually to the heavy bombers. This would take him through many courses at several sites. After primary flight training, he would have gone onto basic flying. Here a nine week course of some 70 hours or so would have taught William more basic flying skills, including: instrument flying, aerial navigation, night flying, long distance flying, radio operations and etiquette, and finally formation flying.
One of these first stations would be Lemoore AAF in California. Whilst here, William would learn firsthand the perils of flying, when on May 20th, 1943 he was involved in a mid air collision with another aircraft piloted by Air Cadet Donald. W. Christensen (S/N: 39677502). Sadly, Christensen would die in the crash whilst William would suffer a wound to the forehead.
I have, since the original post, been able to establish beyond doubt that this is the accident that Dee refers to, although she would later retell the event believing it was a B-24 at a Biggs Field, El Paso, in Texas.
The Army Air Corps used a range of aircraft to train pilots in basic flying, one of the more powerful and complex models was the single engined aircraft the Vultee BT-13 (replaced by the Vultee BT-15). On that day (May 20th, 1943) William was flying solo in BT-15 #42-1957 at Lemoore AAF, and was approaching to land.
The official records (crash number 43-5-20-6)*8 held at the Air Force Historical Research Agency, states that:
“At 17:02, May 20, 1943, while upon final approach at Lemoore Field at the termination of a routine training flight, Student Officer, 1st. Lt. W.G. Rueckert collided with A/C D.W. Christedsen [sic].
Both airplanes were approaching the field in the usual manner. The wind was slightly from the right at 10 mph. Position of the approaching ships gave the control ship stationed on the south-west corner of the mat no cause for alarm. A/C Christensen in ship 32 was in front below and to the right of Lt. Rueckert in ship 12. Several hundred yards from the south-west edge of the mat. Lt. Rueckert noticeably dropped the nose of his ship which struck the A/C Christensen’s airplane behind the canopy. Both airplanes remained in contact and fell to the edge of the mat from a height of about 50 feet. A/C Christensen plane landed on its back, exploded and burned killing A/C Christensen immediately. Lt. Rueckert’s landed nose first, broke clear of the other plane and the pilot jumped out and attempted to extinguish the blaze with his fire extinguisher. He sustained a cut on his forehead and shock. The fire truck and ambulance arrived immediately afterward, put out the blaze and conveyed Lt. Rueckert to the hospital.
Lt. Rueckert stated that he never saw A/C Christensen’s plane in the traffic pattern.
It is probable that one or both pilots were making improper correction for wind drift although witnesses were located at angles which made it impossible to verify this fact.”
The enquiry that followed concluded:
“Failure of pilot in airplane to look around. Poor correction for drift on the part of one or both pilots. Lack of control tower in the vicinity of mat. Present control tower is approximately four thousand feet from the scene of the accident.“
Dee would later retell the story to Bill, describing how she went to the hospital and how she had to remove little splinters of the shatter windshield from William’s forehead for weeks after the crash. It had been a hard lesson learnt for William.
On completion of the basic course, he then transferred to the multi engined Advanced Flying Course at Stockton Field*4, California, the Air Force’s first west-coast Advanced Flying Field. Here William was enrolled in Class 43-H.
On the Advanced Flying Course at Stockton Field, William would have undertaken a further seventy hours of multi-engined flying, formation flying, night flying and instrument flying using standard training aircraft such as the: Curtiss AT-9, Beech AT-10 or the Cessna AT-17 / UC-78. Upon completion of this course, William would receive his wings and a Commission.
Whilst William was here at Stockton Field, his son Bill, would reach his first birthday and William would send a heartfelt letter home telling Bill how much he missed him, and looked forward to spending time with him again. In his opening paragraph William said to Bill: “This eventful year you have quickly grown from an infant, into one grand, little boy, and I’m certainly proud of you, Billy.”
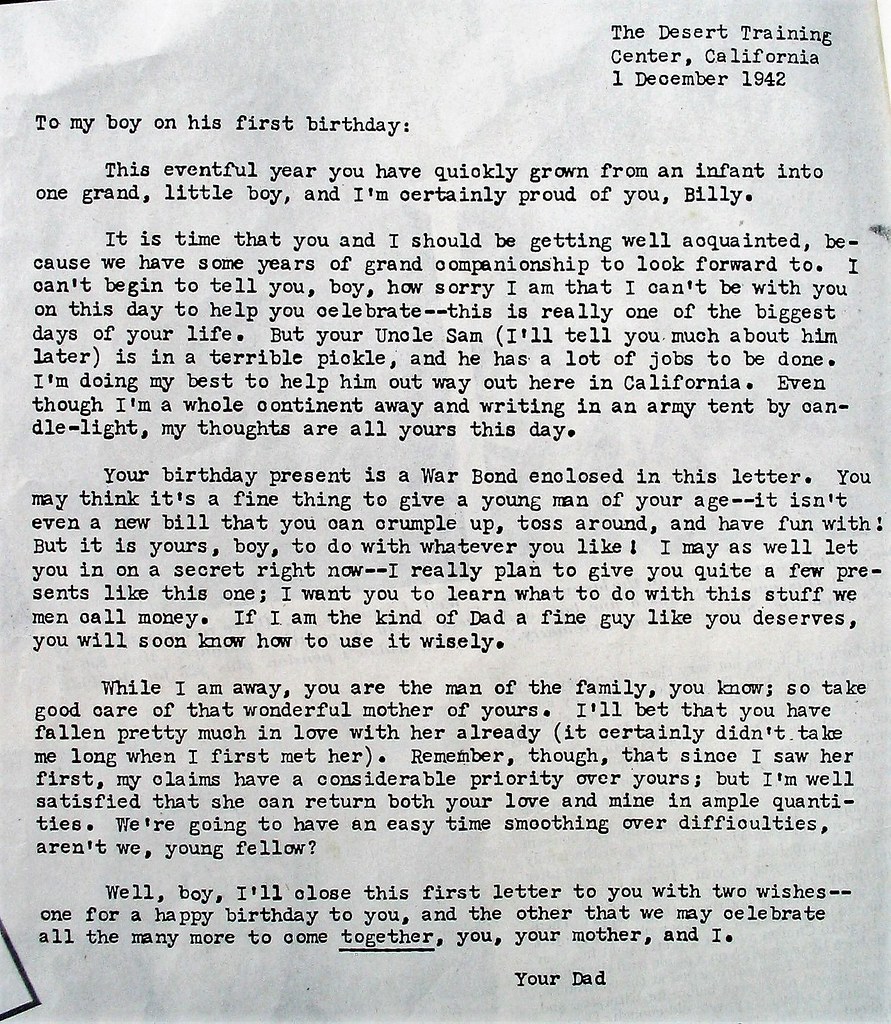
William’s letter to Little Bill on his first birthday
The course lasted well into 1943, and on August 30th, Lt. William G. Rueckert graduated received his wings and his commission – his dreams were slowly becoming a reality.
For his next posting, William would be transferred to Kirtland Field, New Mexico (formerly known as Albuquerque Army Air Base, being renamed Kirtland Field in 1942 after Colonel Roy C. Kirtland), which specialised in navigation and bombardier training. The aircraft used here were the twin-engined Beechcraft AT-11 or the Douglas B-18 Bolo aircraft. Although split into three specialist schools, it also trained entire crews ready for the heavy Bombers the B-17 and B-24. It would be here that William would have his first encounter with the B-24 ‘Liberator’.
On October 28th 1943, William passed his instrument flying test, and by the time he was finished at Kirtland Field, he was a qualified pilot instructor on B-24s. With this under his belt, William was now ready, his flying training completed, he would transfer again, this time to Biggs Field, El Paso, Texas.
It would be here at Biggs Field that the family would be reunited once again, Dee and Bill joining William on the base’s accommodation. It would also be here that Dianne, Bill’s sister, would be born. Dianne sadly passing away in 2007.
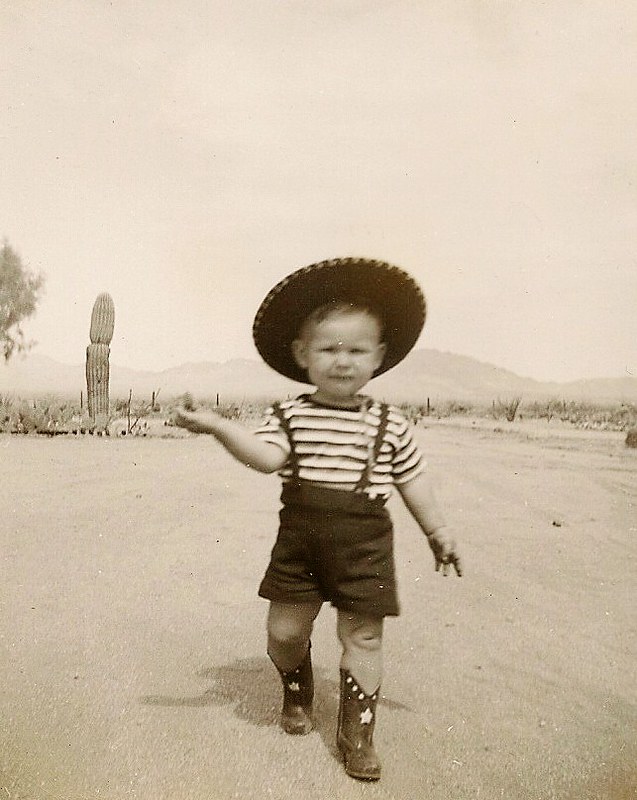
Little Bill in El Paso. The boots, he tells me, he still owns today!
Dee’s account of the accident that is now believed to have been the Lemoore AAF collision was retold later to Bill. Her account of the day’s events being sketchy. I am continuing to search for evidence of this but it is unlikely that William was involved in an accident whilst here at El Paso.
Finally, the draw of the war led William to requesting a post overseas. But before departing, he would pick his own crew members, Harold Emerson Roehrs – his co-pilot, and Jimmy Gardner – his navigator, both of whom he had become good friends with at El Paso.
Later in life, Harold Roehrs would write his own biographical account, “Harold’s Story“, in which he mentions William in a dedication. William being the one who taught Harold to fly a B-24, something Harold had to prove to his Commanding Officer Major (later Lt. Colonel) Thermand D. Brown. In doing so, Harold flew Major Brown around the skies of Hardwick until he was convinced, and convinced he was! In his book, Harold pays homage to William saying of him: “My pilot and friend who shared his knowledge and taught me how to fly a B-24 Liberator“. William being one of those many people who helped shaped Harold’s life.
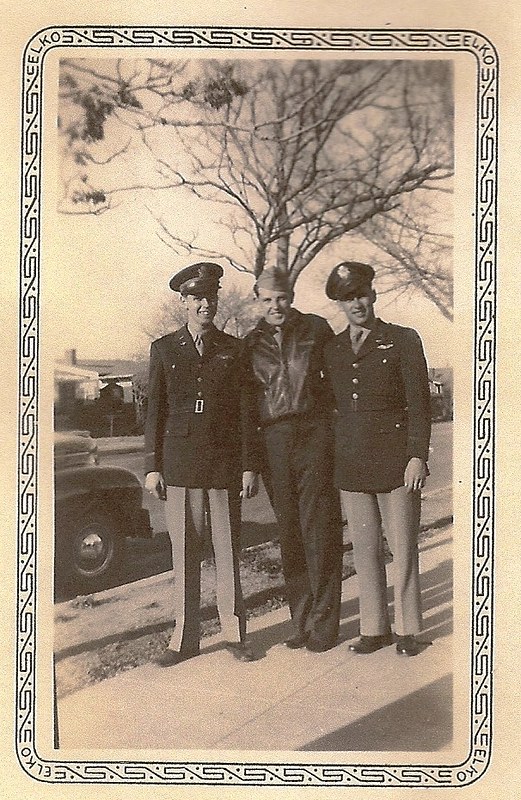
Left to Right: William, Jimmy and Harold at El Paso
The three friends would all be posted together to RAF Hardwick, Norfolk, England to join the 409th BS, 93rd BG, 20th Combat Wing, Eighth Air Force, in April 1944. All three serving in the same crew.
The three left Biggs Field travelling to Forbes Field, Topeka, Kansas at the end of March 1944, where they would collect their B-24 to fly to England. The aircraft was loaded up and they took off heading over the southern route.
Off to War.
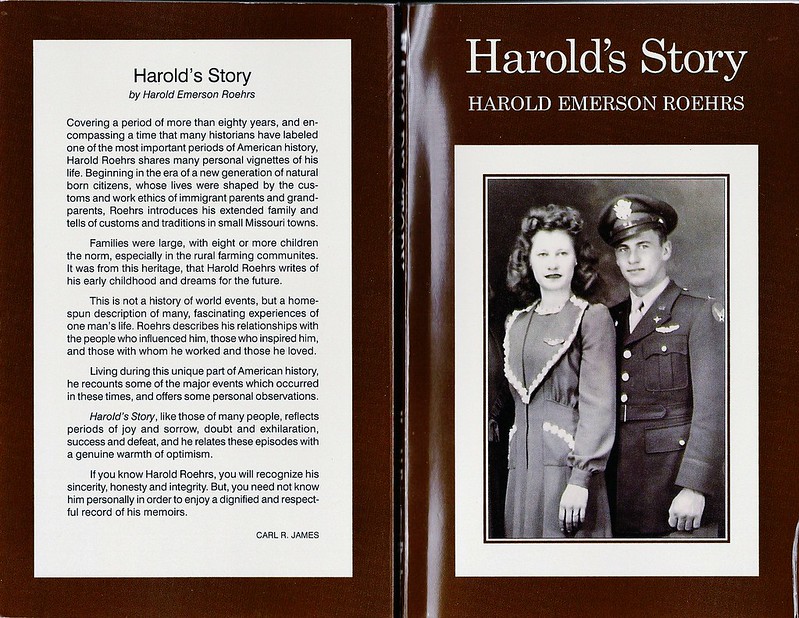
“Harold’s Story” is dedicated to many including William Rueckert.
Harold detailed the journey in his book “Harold’s Story”*3, shining an immense light on the enormity of the trip, one that was made by many crews transporting themselves and aircraft across the vast southern hemisphere to a war very far away.
The journey would be broken into stages, each covering many miles, with hours of flying over water. Much of the journey taking in hot humid days broken by the cold nights, the time when they would fly the most.
The first part of the journey took them from Topeka to West Palm Beach on Florida’s southern point, then via Aguadilla, Porto Rico, to Georgetown in British Guiana. The crew would then fly onto Belem in Brazil before arriving at Fortaleza, their last stop before the next leg and the Atlantic.
The crossing of the Atlantic, then took the crew from Fortaleza, across the monotonous waters of the southern Atlantic Ocean. They were aiming for Dakar on the Cape Verde Peninsula, Africa’s most westerly point. The 1,928 miles would take them exactly twelve hours and thirty-five minutes, and cross four time zones point to point.
After a nights rest, the crew then flew from Dakar to Marrakesh in Morocco, where they waited for five days until the notoriously poor British weather cleared sufficiently for them to proceed. Finally, they were given the go-ahead, and the last leg would take them around neutral Spain and Portugal, wide of the Bay of Biscay, arriving finally at the US Staging post RAF Valley in Wales. (RAF Valley, had been designated a major staging post for US arrivals along with St. Mawgan in Cornwall and Prestwick in Scotland).
As in many cases, the aircraft flown over by the crews was not the aircraft they would keep as part of their operational unit. The new aircraft being taken and flown by ferry crews to other operational squadrons. From Valley, crews would make their way to Liverpool where they would then be transferred to their assigned squadrons, William, Jimmy and Harold making their way to Hardwick by train. The journey not being a direct one, would lead to them arriving at Hardwick (Station 104) on April 24th 1944.
Formed only two years earlier on 22nd April 1942, the 409th was to be William’s only operational squadron. Having won three D.U.C.s already for operations over Europe including, the raid on the Romanian oil fields at Polesti, and the enormous raids of February 1944 ‘Big Week’, the 93rd were already a battle hardened group.

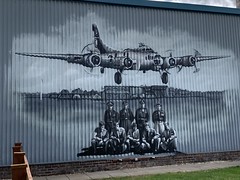
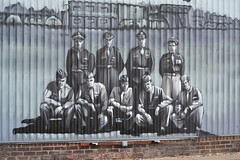
A B-24 Liberator (YM-H, serial number 42-95258) of the 409th Bomb Squadron, 93rd Bomb Group (IWM FRE 3762)
“Ted’s Flying Circus” as they were to be known, were very much in the front line of operations, taking part in the preparations for D-Day, completing much of their bombing missions over the Normandy area. Here they focused on cutting German supply lines and vital communication routes across France.
First and last Mission.
William’s first and only mission, was on May 1st 1944, one week after his arrival at the base. It was to be an early morning flight, take off at 05:00. Mission 332 was for more than 500 heavy bombers of the 1st, 2nd and 3rd Bomb Divisions, to attack V- Weapons’ sites in northern France. These “Crossbow” operations were designed to destroy launching areas for the Nazi Terror weapons the V-1s that were targeting London and the South East. On that day William and Jimmy decided to volunteer to fill the vacant co-pilot and navigator spots in the crew of pilot Second Lieutenant Albert Schreiner (s/n: 0-805532) on B-24 ‘Joy Ride‘ #42-7621, leaving his other regular crewmen behind at Hardwick including Harold. William’s work ethics playing one last card as he wanted to get familiar with combat missions before taking his own crew out.
2nd Lt. Schreiner, a veteran pilot from Gloucester County, New Jersey had been along a similar path to William’s, the ‘green’ newcomer. A Cavalry man he had enlisted in 1941, joining the National Guard before transferring across to the Air Corps.
On the night before the mission, William visited the local church at Topcroft, here he said his prayers in preparation for the following day’s flight. The church having strong links with the base, continues to honour the crews today.
The next morning, May Day 1944, two missions were planned, the first to the V Weapons site at Bonnieres, the second to a Brussels railway yard. About half the aircraft managed to get airborne for the first sortie, then it was the turn of ‘Joy Ride’.
The engines roared into life, 2nd Lt. Schreiner had signed the aircraft off fit for flight after a fuse for heating the suits had been replaced; the brakes were released and the aircraft began its roll along the perimeter track to the end of the runway where it sat waiting. After the signal to go was given, the engines were brought to full power, the brakes released and the aircraft shook and shuddered its way down runway 020 heading south. As it reached almost mid point it began to lift off, and when about 20 – 30 feet in the air, Schreiner gave the order to raise the undercarriage. S/Sgt. Monnie Bradshaw, the Top Turret Gunner / Flt. Engineer reported all instruments were well. He reached down to the undercarriage levers, when suddenly the aircraft hit the ground with an almighty sound.
A heavy landing tore off the left undercarriage leg and the nose wheel collapsed. Unable to gain any height, the aircraft crashed down and slid along the rest of runway 020 spinning round several times before ending up at the crossing with runway 032. Flames had by now engulfed the bomb bay and fuselage, Bradshaw pushed open the top hatch striking the Navigator 2nd Lt. James E. Gardner, on the head. Not seriously injured, both men escaped from the aircraft through the hatch, the top turret now resting on the nose of the stricken B-24, the fuselage engulfed in fire.
In the B-24 lined up behind William’s aircraft was Radio Operator Sgt. Cal Davidson who was stood between the pilot and co-pilot, a common practise on ‘night’ flights which allowed the pilot to focus on the instruments whilst the Radio operator watched the runway. Watching carefully between the rows of burning oil drums that lit the darkened runway, Davidson had a grandstand view of the incident that unfolded in horrifying detail in front of him. He described how he watched as William’s B-24 carrying a full load of fuel and bombs, took off from Hardwick’s north-south runway 020. In his diary that day, Sgt. Davidson wrote*5:
“May 1 Blue Monday. No sleep last night as we were called for a mission, briefed at 2:00 and scheduled for a 4:00 take off flying the “War Goddess” to go on a practice mission before going to the actual target. As we sat on the runway next in line to take off, the plane ahead of us didn’t make it off crashing and exploding about 2/3rds of the way down the runway. Flames shot up and lit up the whole field. As I was standing between the Pilot and Co-pilot, the three of us watched stunned at what had just happened. Neast [The pilot: John K Neast] put his head down on the controls and said “O God why did this happen?”. He’d never taken off in the dark before and said he was all set until this happened. The tower sent up red flares and told all remaining crews to get out of their planes. Once out of the plane with the engines quiet you could hear the 50 calibre bullets going off and the 500 lb bombs began exploding. Colonel Fiegel Base Commander and our Sq. C.O. Major Brown had tears in his eyes as he told us it was a 409th plane. Major Brown is one of the finest officers I have ever met.”
He then goes onto say:
“One of those killed was a young French-Jewish boy from our barracks and had the bunk next to mine. We had nicknamed him ‘Frenchie’ ”
‘Frenchie’ was Radio operator Sgt. Sheldon Sheinfine, who claimed to be probably the only French-Jew in the Eighth Air Force, he shared a barrack hut with Davidson, having adjacent bunks. Davidson himself, cleared out Sheinfine’s belongings almost immediately, and his loss, and the loss of the crew, had a great impact of Davidson.
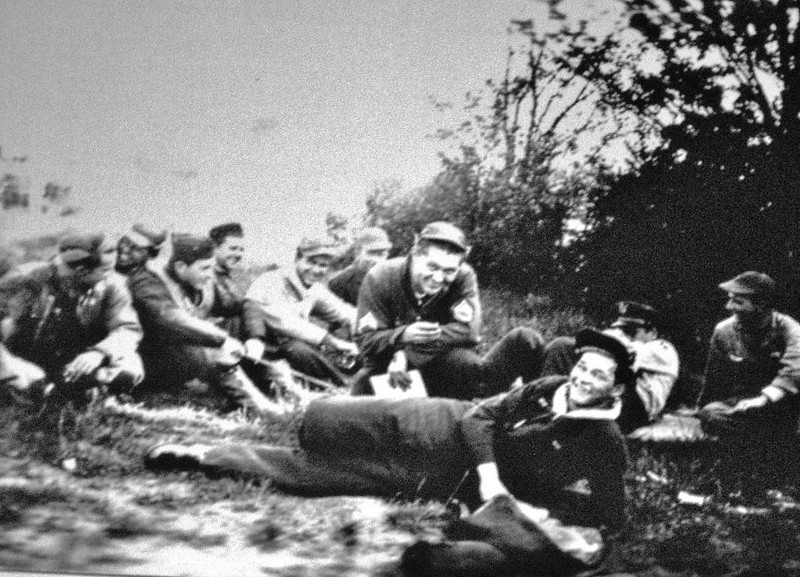
Sgt. Cal Davidson (laying down front)
Two nearby Groundcrew Sgt. Harry Kelleher*2 and Sgt. Johnny Findley also witnessed the crash. Sgt. Findley was closest and recalled how he heard “the squeaking sparks flying off, as the plane slid along the runway“. Then he watched as it “burst into flames as it continued down 020 north-south to 032 runway“. Findley ran over to one of the ejected crew members holding him until rescue crews arrived. Sgt. Kelleher leapt into a jeep and raced over to the crash site picking up a further two crewmen. “At that point” Kelleher said ,”the gas tanks exploded knocking over the jeep“. That was enough and they made a quick exit, in Kelleher’s words “they got the hell away.”
Standing on dispersal number 8, Engineering Officer Captain Thomas H. Jackson also saw the aircraft “crash and burn“, as it slid along the runway it “burst into flames“.
Another witness, ground crewman Corporal Johnny Fridell Jr*7, who was standing by runway 020 as the B-24 slid along on its belly, described sparks flying from the aircraft until it reached the crossing with 032, spinning around catching fire. Fridell then jumped into a shelter fearing what was about to happen. Over the next half an hour, seven of the 500 lb bombs on board the B-24 exploded, the full complement of fuel caught fire and the ten ammunition boxes containing nine yards of .50 calibre bullets, began exploding too. It was a massive fireball from which it was unlikely anyone would survive.
Standing on the balcony of the control tower, the Commander Colonel Leland Gordon Fiegel, also watched as the lumbering B-24 came down onto the runway and caught fire. From where he stood, he didn’t think the damage was any more worse than “an ordinary belly landing“, but noted how “the fires increased rapidly in their intensity“.
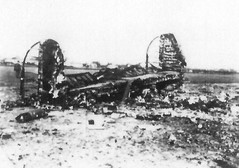
The tail section of B-24 “Joy Ride” after the crash.
Ground crewman Cpl. Johnny Fridell , along with rescue crews, then ran toward the fireball to try and help anyone they could. Miraculously, of the total number of crew, three were uninjured: Navigator 2nd Lt. James Gardner, Waist Gunners S/Sgt. Harold Loucks and T/Sgt. Kerry Belcher, mostly located within the rear of the aircraft between the bomb bay and the tail. Two further crewmen received injuries; Top Turret/ Flight Engineer S/Sgt. Monnie Bradshaw and Tail Gunner Sgt. Anthony Constantine. The remaining five, including Rueckert, were killed: Pilot 2nd Lt. Albert Schreiner, Bombardier 2nd Lt. Paul Sabin, Radio Operator S/Sgt. Sheldon Sheinfine and Nose Gunner Sgt. John Dalto. All of these were located in the front portion of the aircraft. The fire and explosions were so intense only a single thumb was found by rescuers.
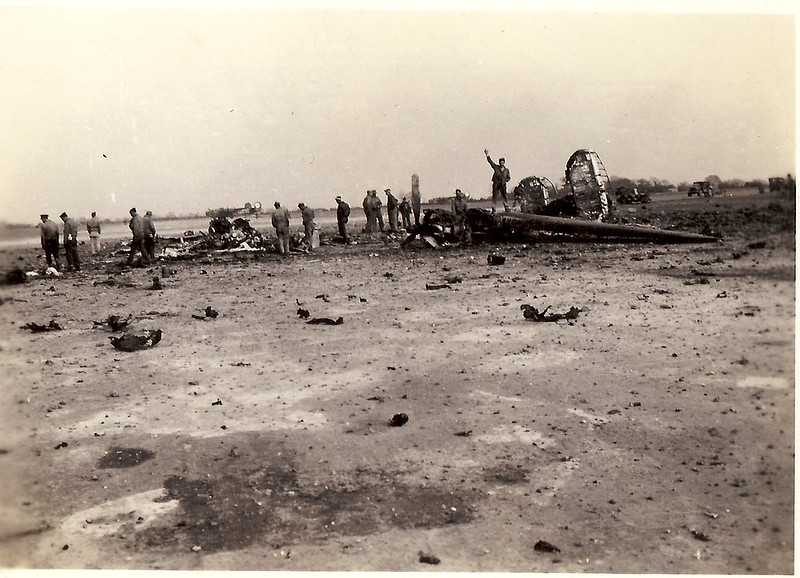
The remains of Reuckert’s B-24.
By 16:00 RAF Bomb Disposal crews had managed to remove and deal with the remaining bombs, it was thought at this stage the aircraft may have suffered from prop wash, a devastatingly dangerous effect caused by preceding aircraft creating turbulent air.
The explosion caused such damage that it created a huge crater closing the two main runways for five days. The mission was scrubbed (22 aircraft had already gotten airborne and carried on), red flares being fired into the night sky instructing crews to abandon their aircraft and return. For the next week all aircraft had to take off using the short runway and climb up over nearby woods approaching Topcroft village. As a result of the difficulty in doing so, there were subsequent crashes at Hardwick, with aircraft falling into the woods beyond the airfield. The crater and burnt debris of William’s B-24 leaving a stark reminder of the dangers of flying a heavy bomber laden with combustible and explosive materials.
Dee finds out!
For seventeen days Dee knew nothing of her husband’s fate. At home, she had been working on the new family flat at St. George, on the north-eastern corner of Staten Island, whilst living a few miles away with her family at Castleton Corners. Dee had been writing letters every day, in many cases two or three times a day, but unbeknown to her they were not reaching her husband very quickly – if at all.
To Dee, the old furniture with scratches and rips from the dogs they had owned held fond memories of their early days together. The many moves they had made as William had been posted from one training airfield to another, were emphatically etched in their structure.
Dee was at her mum’s house on May 18th when the buff telegram arrived. With ‘Western Union’ emblazoned across the top and two tell-tale red stars*6 in the bottom left corner, Dee knew exactly what it meant, she didn’t need to open it. As the tar stained hand of her father held it out to her, her life fell apart. The man she had adored for the last five years was gone, the moment she, and all serving personnel wives’ feared, had happened. She became ill and slid towards depression. Seeing the changes in her, Dee’s mother took charge, she gave up her own job and took Dee and the two children in. Encouraging Dee to go out and get a job, as she cared for Bill and Dianne and nursed Dee back to full strength.
Gradually, Dee recovered and got her life back on track. Small reminders would never be far away though, each one bringing William back to her thoughts. Not long after his death, flowers he had ordered only days before the accident, finally arrived on Dee’s doorstep.
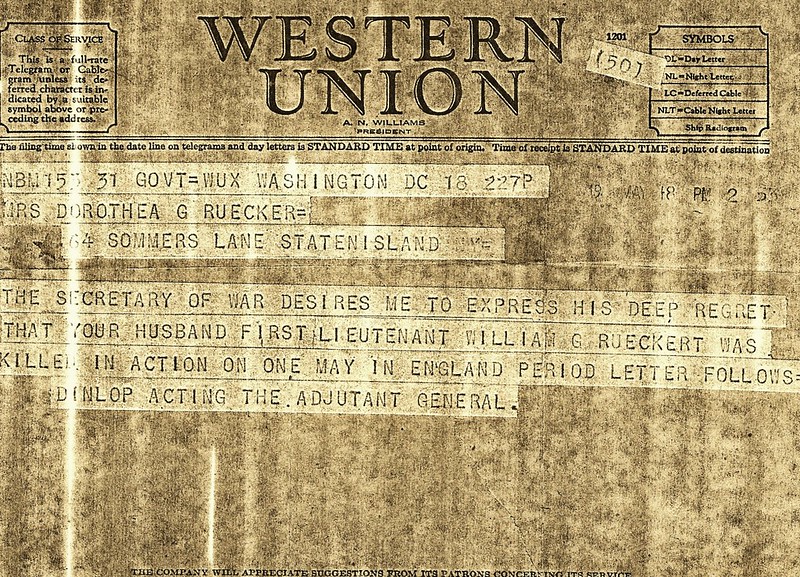
The dreaded Telegram that brought the news of William’s death to Dee
Shortly after the 20th, a confirmation letter arrived from the War Department in Washington D.C. In three short paragraphs it confirmed that William had been “killed in action on 1 May 1944 over England.” It said nothing about the incident, as these are “prepared under battle conditions and the means of transmission are limited“. Signed by Brigadier General Robert H. Dunlop, it told Dee that William’s service had been “heroic“.
Back in the UK, those that had escaped, particularly William’s good friend James ‘Jimmy’ Gardner the Navigator, went into shock. He was sent to London to recuperate, before being sent home. In later years Bill tried to talk to him about the crash, but the shutters came down and Jimmy understandably turned away from Bill. In June 1944, Harold, Bill’s other good friend from their days at El Paso, would convince Col. Brown of his flying abilities, being approved as a pilot and then assigned another crew, he would go on to complete 37 missions with the 93rd at Hardwick.
In the official enquiry that followed the crash the engineer stated that all engines were running OK, each at 2,600 rpm with 49” M.P. (Manifold Pressure) in each one; recognised as sufficient power to achieve a good take off with the load being carried by the bomber. Schreiner’s training record was scrutinised and found to be in order. The pre-flight mechanic’s report was checked and several eye witness accounts were taken. After deliberations the committee apportioned 100% blame to the pilot Lt. Schreiner’s night take off technique, saying that he had allowed the aircraft to land again without realising what he had done. As a result, the committee recommended modified training for all crews to include further training in night take off and landings.

The first page of the accident report which blamed the pilot for his ‘take off technique’. Note the misspelling of William’s name.
Rueckert’s remains was initially buried at the Cambridge American Cemetery and Memorial at Madingley, a few miles outside of Cambridge, along with the pilot 2nd Lt. Albert Schreiner. Later on, William’s mother asked Dee if his body could be returned to Illinois to be placed along side his father in the family plot in Moline. Dee, still angry at her attempts to stop the marriage, and knowing there was little more than bricks in the coffin, agreed to the move and the coffin was returned in 1952. Of the others, Bombardier 2nd Lt. Paul Sabin was buried in section 14 of the Mount Carmel Cemetery, Raytown, Jackson County, Missouri, and Radio Operator S/Sgt. Sheldon Sheinfine was buried at the Beth Israel Memorial Park, Woodbridge, Middlesex County, New Jersey. Sheinfine was only nineteen years of age. The last crewman to lose his life that day, was twenty-one year old Sgt. John Dalto, who was buried in the Long Island National Cemetery, East Farmingdale, Suffolk County, New York. The average age of the crew that day was only 20 years old.
At the end of the war, one of William’s original crewmen stopped off at Dee’s to explain that William had volunteered to fly in ‘Joyride‘ that fateful day, the purpose being to gain experience before taking his own crew into heavily defended enemy territory.
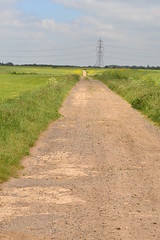
Since discovering a lot more about his father’s death, his son ‘Little Bill’, has repeatedly returned to Hardwick and has become very good friends with the site owner David Woodrow. William’s wings and wedding ring were never recovered from the crash site, and remain buried in Hardwick’s 032 runway, where the concrete patch stands today.
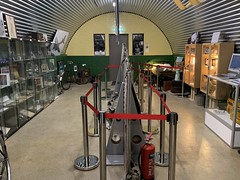
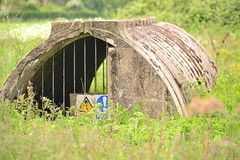
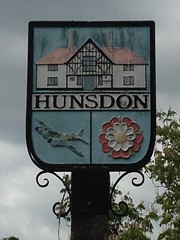
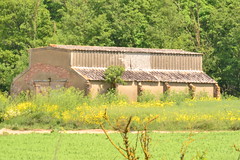
On the farm that now stands in the place of Hardwick airfield, is a small museum, maintained by a volunteer crew set up by both David Neale and David Woodrow. The farm also has a memorial to the 93rd BG and regularly honours those who served. During the time the airfield was open, a pond was located in this area, into this pond aircrew who had passed their statutory mission number were thrown, a right of passage that allowed them to go home. Many however didn’t, choosing to stay on and serve for longer.
Following the accident, 1st. Lt. Rueckert was awarded the Purple Heart, as was the pilot. His son Bill, has since donated a replica of the medal to the church at Topcroft, the church William visited the night before his death.

William Rueckert’s certificate for his Purple Heart.
Inside the church, a plaque sits on the wall remembering the 668 men who never returned to Hardwick from missions. William’s name also appears in the St Paul’s Cathedral Roll of Honour, on page 365.
William G Rueckert was a brave young man who, like many others, went to fight a war a long way from home. Doing their duty came above all else, but like many others he longed to see his wife and family. Sadly, that day never came, and William lost his life serving the country and people he loved.
RAF Hardwick and the story of the 93rd BG whilst based here appears in Trail 12
William G Rueckert appears on the World War II Honours list of Dead and Missing, State of New York 1946 Page 136.
Sources, notes and further reading.
Much of the basic information used was supplied by William Rueckert (Little Bill) through emails, and all pictures (unless stated) were donated and used by kind permission from Bill to whom I am truly grateful.
*1 The Eastern Daily Press ‘Weekender’ was published on December 13th 2014.
*2 Sgt. Harry Kelleher went with the 39th BG when it took part in the Polesti raid. His rank was that of Non-flying Ordnance ground crew. However, it is believed he joined Captain Llewellyn L. Brown’s crew taking the position of Ball Turret Gunner on the B-24 #41-24298 ‘Queenie‘ which was hit by flak and diverted to Sicily. Harry had been denied the opportunity to fly in the bomber by his superiors, but went anyway. He is credited as Ball Turret Gunner on the ‘American Air Museum’ website having been awarded the Air Medal and the Distinguished Flying Cross. Harry had relayed the story to Little Bill before passing away, however, none of the crew have ever verified his claim and no other record seems to exist of it.
*3 Extracts from “Harold’s Story” written by Harold Emerson Roehrs, William’s best friend, were kindly given to me by Bill. The book I believe is now out of circulation.
*4 The History of Stockton Field can be found on the Military museum website, including images of Stockton Field taken during the war.
*5 Email from Cal Davidson to Bill Rueckert 25/8/04, courtesy of Bill Rueckert.
*6 One Red Star would signify Missing in Action or wounded, whereas two meant they were killed. Hence anyone seeing the telegram would know before even opening it what it meant. Dee’s father owned as company that repaired water tanks on top of the skyscrapers using tar, hence his hands were always covered with it.
*7 Corporal John L. Fridell Jr (s/n: 14077456) was one of the ground crew for ‘The Sleepy Time Girl‘ also referred to as “Sleepytime Gal‘ which completed 135 missions without returning once with mechanical problems.
*8 Accident number 43-5-20-6 Lemoore Army Air Field provided by the Air Force Historical Research Agency.
All quotes regarding the crash of the B-24 are from witness statements taken from the War Department Investigation, Report of Aircraft Accident Number 0000198.
USAAF Training Aircraft Fuselage Codes of WW II website
Abandoned and Little known Airfields website has a very interesting collection of photographs and information on Lemoore AAF.
Kirtland Air Force Base Website
MyBaseGuide website
Aviation Archaeological Investigation & Research website.
El Paso Times Website.
2Lt. Thomas E. Cartmell Blog by Michael John Hughey, MD
My sincere thanks go to Bill for allowing me to publish his father’s story and to all those who have contributed comments, corrections and information about the accident. I am continuing to search for further information, if / when this arrives, I shall add it to the text.


